NOTE: Since this article was publish Google announced that it would be sunsetting their Tour Creator. Here is a link to a resource listing alternatives to Google Tours. One that seems promising (though we have not used it) is Marzipano. For a video review of options check out this YouTube video by Educator Eric Hawkinson.
When shelter-in-place orders closed the doors of museums around the world, many museums had plenty of digital content to push out while for visitors stuck at home. But looking at digital content is not the same as a true visit. A virtual tour won’t put a 10-foot sculpture or 30-foot canvas into anyone’s living room, but with Google’s free 3D tools, you can still delight your virtual visitors.
In this article, we’ll walk you through the steps of building a virtual audio tour of your museum. A disclaimer up front: This will work best if your museum has Google Street View or 360° images inside your space. That said, if you have stories that can be told without bringing people inside of your physical museum, you might still get some great use from this.
Google Tour Creator
If you poke around the Internet, you’ll quickly find that Google has developed a ton of free, experimental tools over the years, many of which work with Google Earth or Google Maps. But a lot of them have weird quirks or have even been sunsetted by Google. One example is Google’s Tour Builder, not to be confused with Tour Creator. (Not only does Google have a glut of tools they have a scarcity of names, apparently.)
Google Tour Builder allows users to create a guided tour of Google Maps. We imagined it could be used in place of a timeline, or to supplement timeline content. But when we mocked up an example we discovered that it couldn’t be viewed logging into Google first. Not great if you’re trying to make something public.
But then we discovered the similarly-named Tour Creator. This tool is part of Google’s Poly initiative, which allows people to create 3D projects. After spending a little time in the tool, we realized that the stuck-at-home marketing managers, curators, and engagement directors might want to check it out, too.
Here’s how you use it.
Planning Ahead
Before you get started, you might want to plan out the “scenes” that you plan on touring. “Scene” is the word that we’ll be using for each stop on your virtual tour. For each scene, think of the audio tour element that would accompany it. You’ll need to record an mp3 file for each one. This can be traditional narration or ambient sound.
Once you’ve outlined your tour and created the audio files, you can jump right in.
Getting Started
If you’re signed into a Google account, you can get started from the Tour Creator home page. Now here’s another strange disclaimer. While anyone can access a public Tour, some G Suite accounts do not have the Tour Creator tool enabled by default. So check with your administrator, or hop on a personal Google account.
Once you’ve clicked “Get Started” you’ll find a dashboard with your existing tours (if you’ve made one before) as well as a few templates for inspiration.
If you’re ready to dive in from scratch click “New Tour” to make yours.
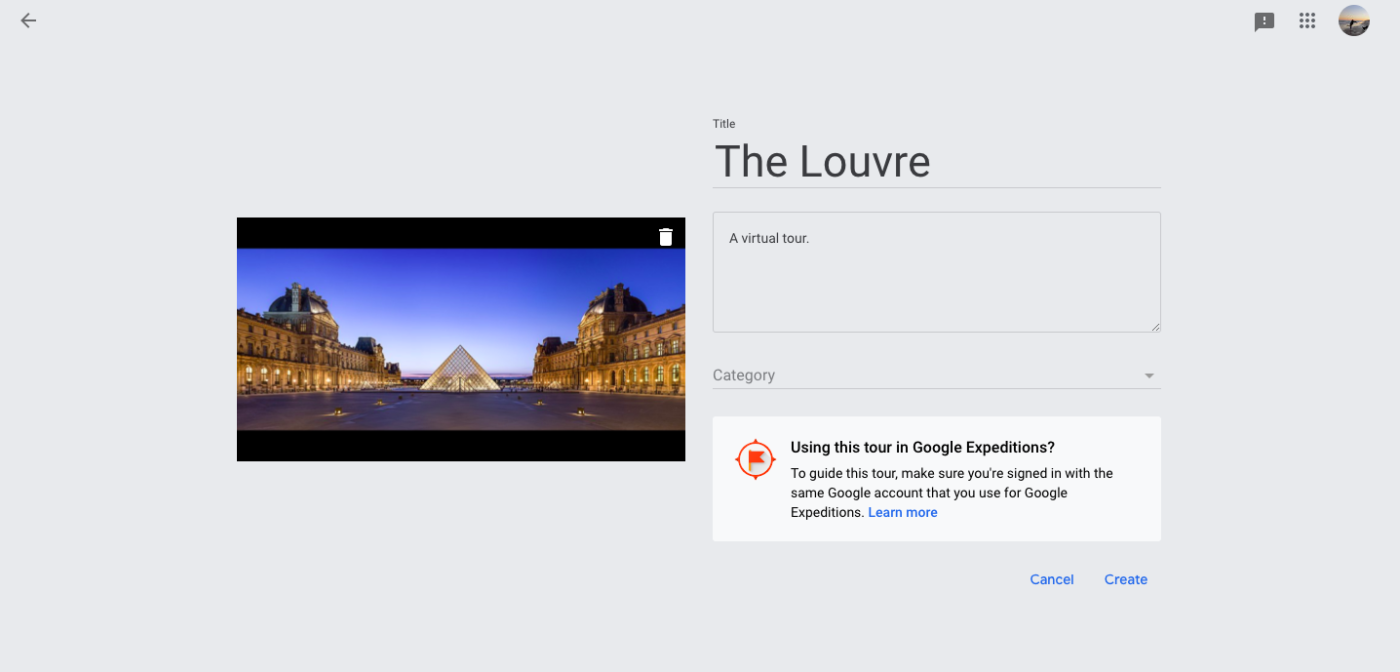
Go ahead and upload a cover image, and give your tour a name and description. You’ll be able to edit these later.
Making Scenes
When you click “create” you’ll be dropped into the tool and prompted to make your first scene. This step is deceptively simple. On the left-hand side of the first pop-up window, you’ll see a Google map. Go ahead and search for your museum, or wherever you’d like to begin the tour.
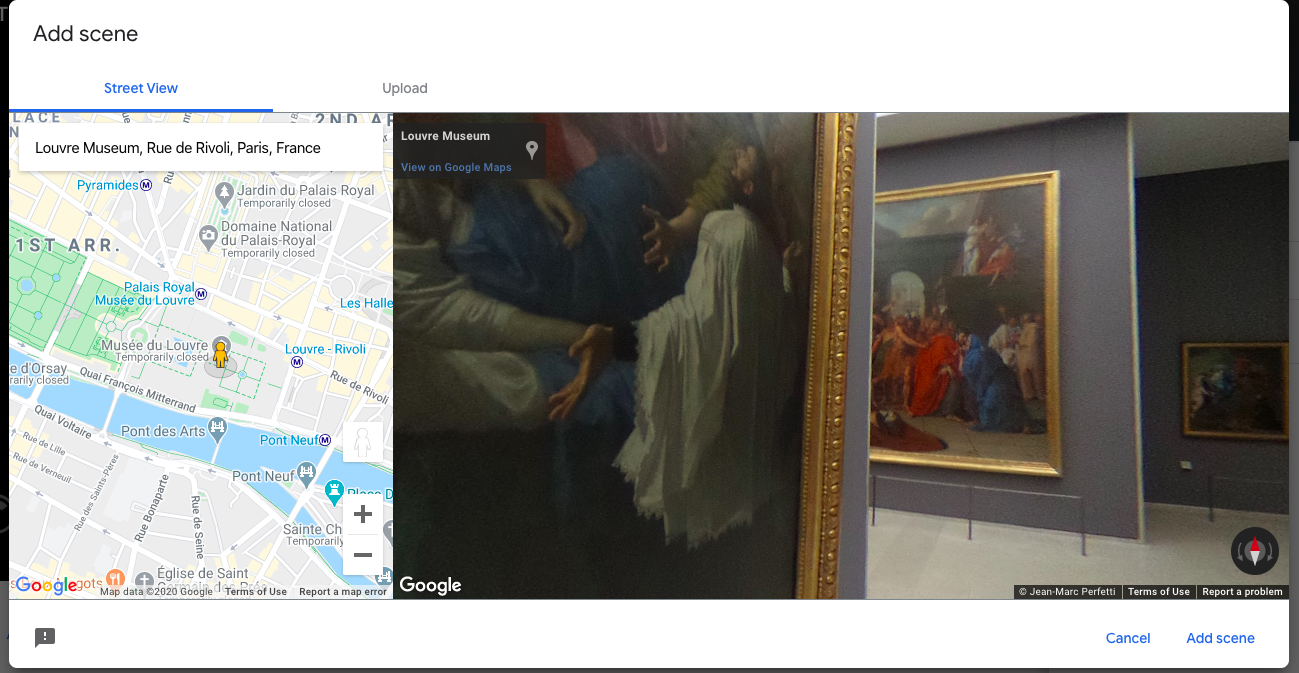
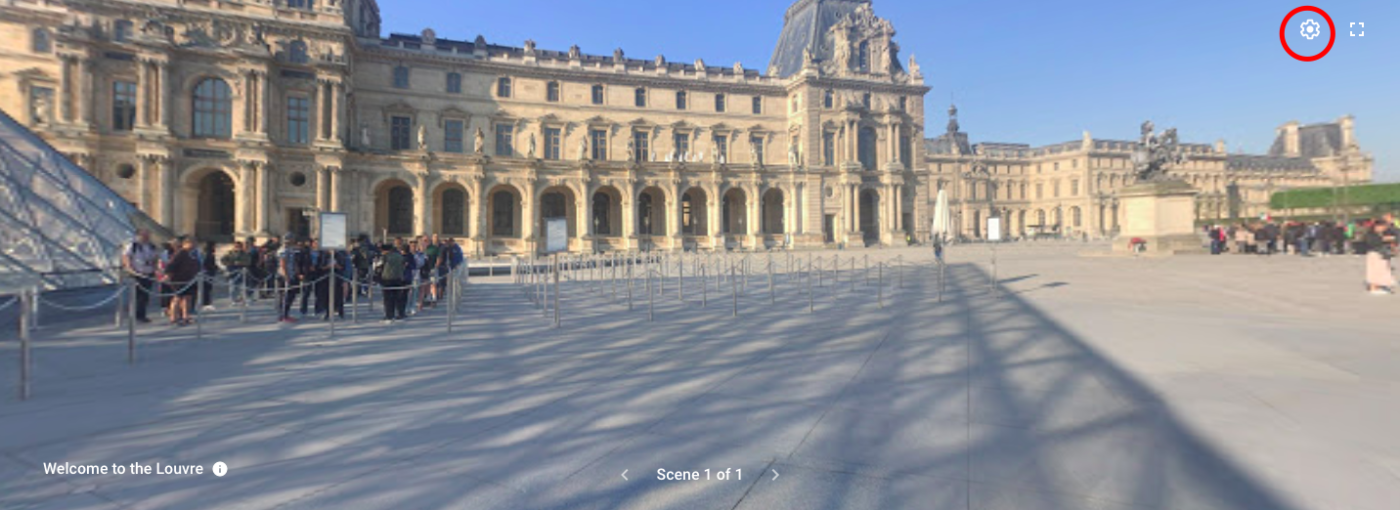
The view you initially get on the right might not be what you had in mind, but we will fix that in a moment. If the little yellow Street View person is where you want to start, then click “Add Scene.” If not, move it around until you find the right point. So in my case, I want to be outside of the museum to start.
Once you’ve added your first scene, you can drag the screen around on the left-hand side to set the starting view from your first scene. This is what your virtual visitors will see first.
Audio, Points of Interest and Overlays
As we mentioned in the title of this post, this can be a guided audio tour. On the right-hand side of your scene’s edit screen, you’ll see fields for a scene title and description. Right below that, are a few more options to make the tour more engaging. To make this an audio tour, you’ll need mp3 files for each scene. Once you’ve got those, click on the icon of a person speaking to upload the first one.
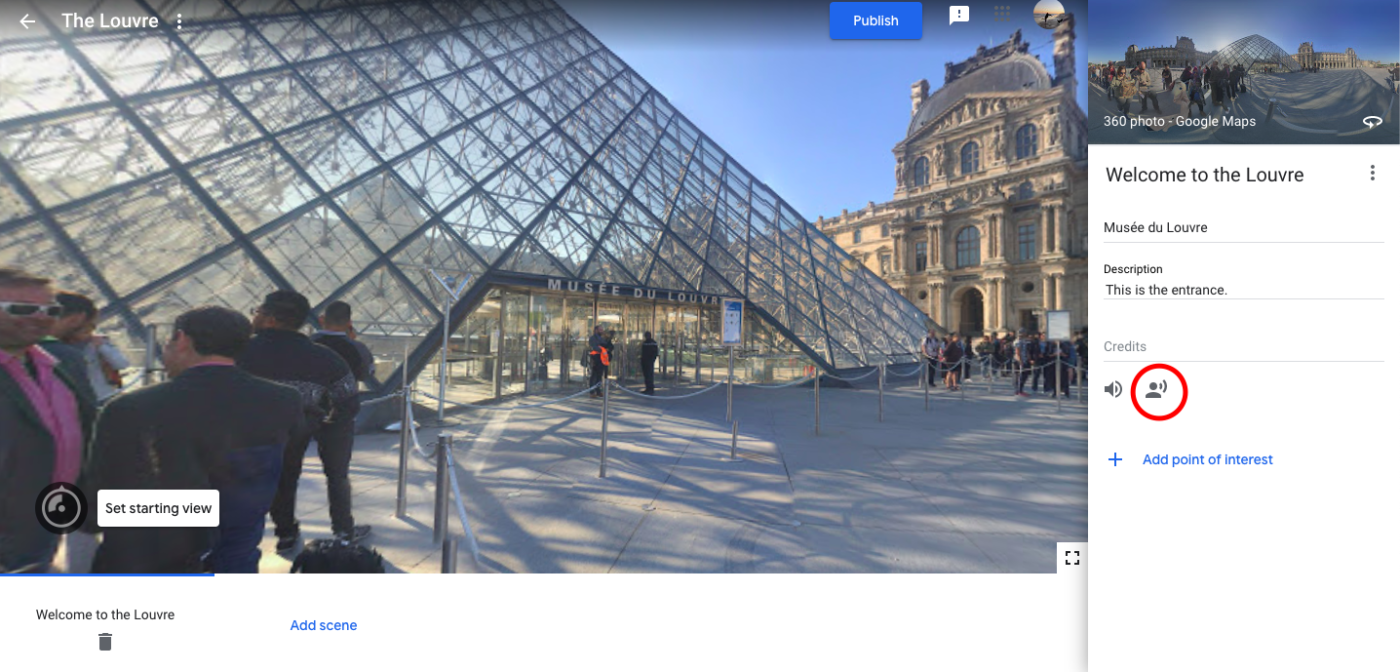
Now, when the user visits this scene, they will hear narration as they explore. A final disclaimer is that the user will need to enable the audio when they start. You can simply add a note wherever you promote your final tour (blog, social media, etc.) that tells them they need to do this in order to hear the narration. Once they’ve done that, they’ll be able to listen to any narration or ambient sounds you’ve added.
But you don’t need to stop with audio. There are a couple more elements that make this really fun. In any scene, you can direct your visitor to look closer at a specific object in the scene. Click on “Add point of interest” to and place the blue information icon.
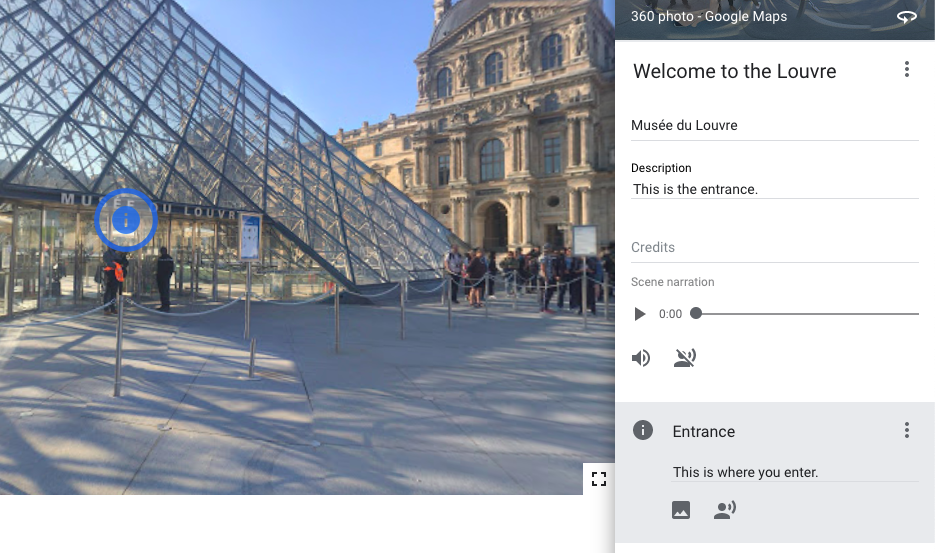
And now you’ve got some options for the point of interest. You can add another mp3 to speak about the specific object, or you can add an image overlay that the user can call up with a click.
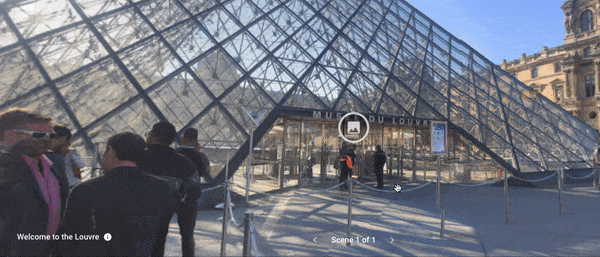
This could be a close-up of a work of art, a map, or any other image that enhances the scene. Click on the image icon to upload an image, and then adjust the size and position of it. It may look a little askew as you edit, but once you’ve placed it, the user will see something like this when they click on your point of interest:
If you’re done editing this scene, just click “Add scene” at the bottom to create another one. And another. And so on and so on until you’ve completed the tour.
Publishing and Sharing
Once you’ve added your scenes, it’s time to publish. You can choose to make your tour “Public”, i.e. discoverable on the web, or “Unlisted”, which means anyone with the link can view it. Once you’ve picked your tour’s visibility, click “Publish” once more to get the URL. Here’s my one-scene tour to give you an idea of what an unlisted tour will look like: https://poly.google.com/view/ebQskHASS_b
Now it’s time to share it on your website, or in a blog post, or on your temporary Museum From Home mini-site.
Even after you’ve published and shared your tour, you can go back and edit it anytime.
Sure, it’s not quite like being there, but this sort of content will keep your museum top of mind with your visitors, and give them something to look forward to when they visit again.